
For Sophia Loren it was pasta, for me it’s rice. Everything that you see, I owe to rice. By everything I mean, my love for Iranian food, which has lead to a desire and passion to learn more about my culture and background. Rice IS the reason I started to cook. My love for rice is on another level. I can eat rice, for breakfast, lunch and dinner, all day everyday! My mom use to poke fun at me and call me “Rashty” (as in from Rasht, Iran) cause I liked to eat rice so much (apparently they consume a lot of rice in that part of Iran). Especially “Kateh” rice, which is the sticky rice. I can eat “kateh” and plain yogurt for days and be completely content. The technique originated from the Caspian Sea region of Iran. Of course now, rice is the everyday food of Iran and Iranians all around the world. It’s the bread and potatoes of my country. No matter what you want to call it; polo, chelo, berenj, pilaf, kateh, dami , safy it’s all the same love affair to me. That smell. That aroma that fills the house when you know the rice is ready. The act of serving rice is such a statement to the culture. Pour the long white grains from the pot, to the service dish, garnishing it with the rich gold saffron and gracing the table as the most awaited centrepiece. Every Iranian dinner table starts and ends with rice. Clearly a no brainer that I dedicate my first blog entry to this iconic cultural menu item.
Two ways to make rice: Kateh and Safy. Quick vs fancy.
- Kateh: This is the quick and easy way to make rice. Kateh, the rice is sticky and compressed. To me it’s the more casual way to make rice. I make kateh when it’s just for Nikoo and I. (Nikoo’s the hubby and he doesn’t care what kind of rice he gets for dinner as long as I made it ) I actually prefer kateh. For me it’s comfort food, so the stickier the better. Also, I find the way the kateh is made, with the “damkoni” or towel it keeps more of the flavor in the rice as it steams. It takes less time, less supplies and less energy to make.
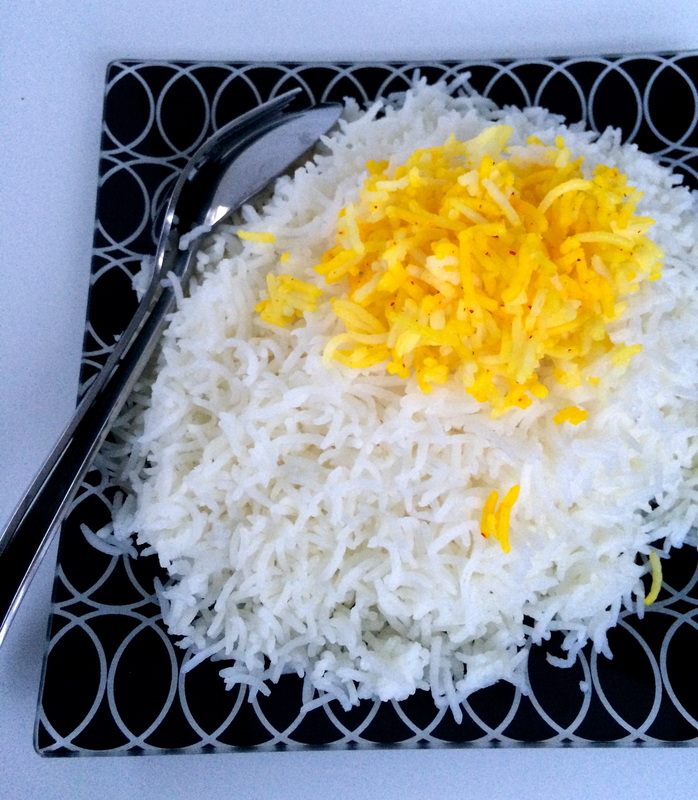
- Safy: (means drained in farsi) This is the fancy way to make rice. Safy the rice is separated, and long. This is how you would make the rice if you were entertaining guests. There are a couple more steps to follow when using this method, but it is completely worth it. When it is mixed with saffron and served on a tray, it looks like jewels.
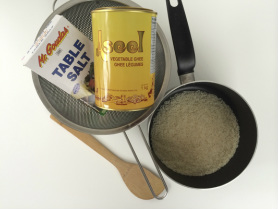
- Choosing the right rice: Basmati Rice is what you’re looking for. Either from India or Afghanistan. Depending on where you live and where you shop, you will come across a wide variety of brands. To be honest the best way to find out which is best is by trial and error. Buy a small bag, use it until it’s done. If you like it buy the same one next time, if you didn’t like it , try another brand. I’ve gone through all sorts of rice and at the moment my rice of choice is Saleem Caravan (when I can find it). I find the grains of rice to be nice and long and the smell and flavor is very powerful. Just the way I like my rice.
- The right cooking pot: Non Stick pot, deep enough to boil water and allow rice to expand.
- Ingredients: Water, salt, ghee (or oil). I’m not one to obsess over what kind or oil or salt. I’m the modern Iranian cook, and most of the time, I cook with what is available and easily accessible. If you can get to a Middle Eastern store and get some vegetable ghee (Clarified butter) great!, if not, use whatever oil or butter you have at home.
- Kateh: This is the quick and easy way to make rice. Kateh, the rice is sticky and compressed. To me it’s the more casual way to make rice. I make kateh when it’s just for Nikoo and I. (Nikoo’s the hubby and he doesn’t care what kind of rice he gets for dinner as long as I made it ) I actually prefer kateh. For me it’s comfort food, so the stickier the better. Also, I find the way the kateh is made, with the “damkoni” or towel it keeps more of the flavor in the rice as it steams. It takes less time, less supplies and less energy to make.
- Safy: (means drained in farsi) This is the fancy way to make rice. Safy the rice is separated, and long. This is how you would make the rice if you were entertaining guests. There are a couple more steps to follow when using this method, but it is completely worth it. When it is mixed with saffron and served on a tray, it looks like jewels.
- Choosing the right rice: Basmati Rice is what you’re looking for. Either from India or Afghanistan. Depending on where you live and where you shop, you will come across a wide variety of brands. To be honest the best way to find out which is best is by trial and error. Buy a small bag, use it until it’s done. If you like it buy the same one next time, if you didn’t like it , try another brand. I’ve gone through all sorts of rice and at the moment my rice of choice is Saleem Caravan (when I can find it). I find the grains of rice to be nice and long and the smell and flavor is very powerful. Just the way I like my rice.
- The right cooking pot: Non Stick pot, deep enough to boil water and allow rice to expand.
- Ingredients: Water, salt, ghee (or oil). I’m not one to obsess over what kind or oil or salt. I’m the modern Iranian cook, and most of the time, I cook with what is available and easily accessible. If you can get to a Middle Eastern store and get some vegetable ghee (Clarified butter) great!, if not, use whatever oil or butter you have at home.
For now we will start with the Kateh, and later work our way to the safy rice.
I usually measure one cup of rice per person. You could measure 1 ½ if its for a group of all adults with bug appetites. It is best to measure more and have leftovers then to not have enough.
For every 1 cup of rice;
- ½ tablespoon of ghee (or oil)
- ½ teaspoon salt
- 1 ½ cup hot water
Depending on the amount of rice, water and cooking temperature of your stove (electric or gas) the cooking times may vary during this process. I’ve tried to explain the steps more based on what the rice should look like rather then how long it will take for it to look that way. I hope this makes sense. Please feel free to leave me comments below.
In the steps and pictures below, I’m making 2 cups of rice.
- 3 cups of hot water
- ½ tablespoon ghee
- 1 teaspoon salt
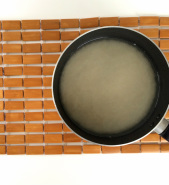
- Washing the rice: Once you’ve measured the rice into the pot, pour hot water over the rice, enough to soak it all. Put your hand through the rice to wash and elevate the dirt and dust sitting in the rice. Rinse out. You will at first notice that the water is cloudy. Repeat three to four times or until the water is clear when you are pouring it out.
I usually measure one cup of rice per person. You could measure 1 ½ if its for a group of all adults with bug appetites. It is best to measure more and have leftovers then to not have enough.
For every 1 cup of rice;
- ½ tablespoon of ghee (or oil)
- ½ teaspoon salt
- 1 ½ cup hot water
Depending on the amount of rice, water and cooking temperature of your stove (electric or gas) the cooking times may vary during this process. I’ve tried to explain the steps more based on what the rice should look like rather then how long it will take for it to look that way. I hope this makes sense. Please feel free to leave me comments below.
In the steps and pictures below, I’m making 2 cups of rice.
- 3 cups of hot water
- ½ tablespoon ghee
- 1 teaspoon salt
- Washing the rice: Once you’ve measured the rice into the pot, pour hot water over the rice, enough to soak it all. Put your hand through the rice to wash and elevate the dirt and dust sitting in the rice. Rinse out. You will at first notice that the water is cloudy. Repeat three to four times or until the water is clear when you are pouring it out.

- After cleaning the rice, refill the pot with hot water.
- Place the pot on the stove
- Put in the ghee, and salt and cover.
- Place the pot on the stove
- Put in the ghee, and salt and cover.
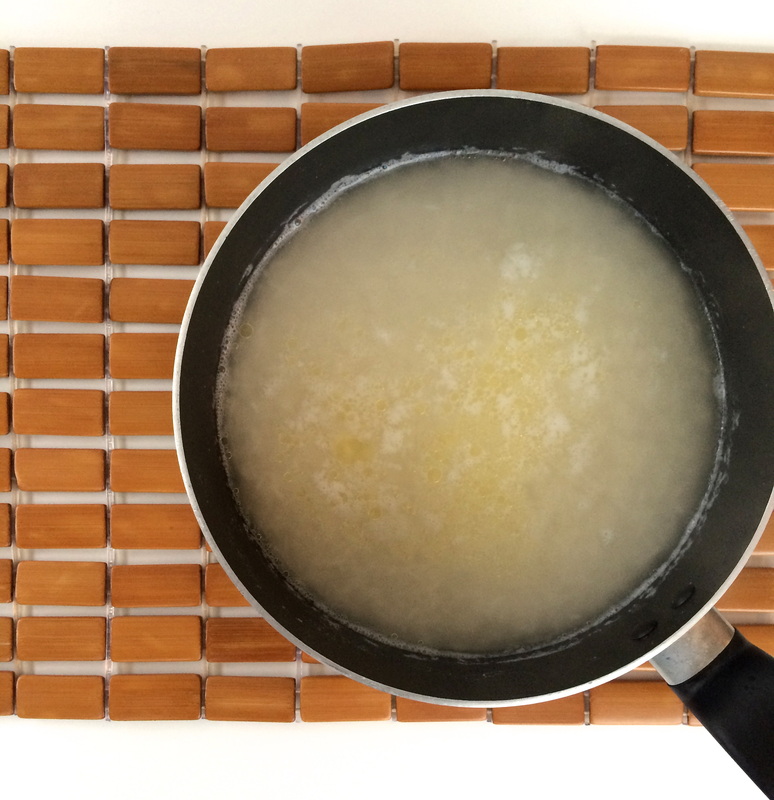
- Put on medium heat and bring to boil. (approximately 10-15mins)
- Allow to boil until all the water has been evaporated. (approximately 20-25 mins)
- Allow to boil until all the water has been evaporated. (approximately 20-25 mins)

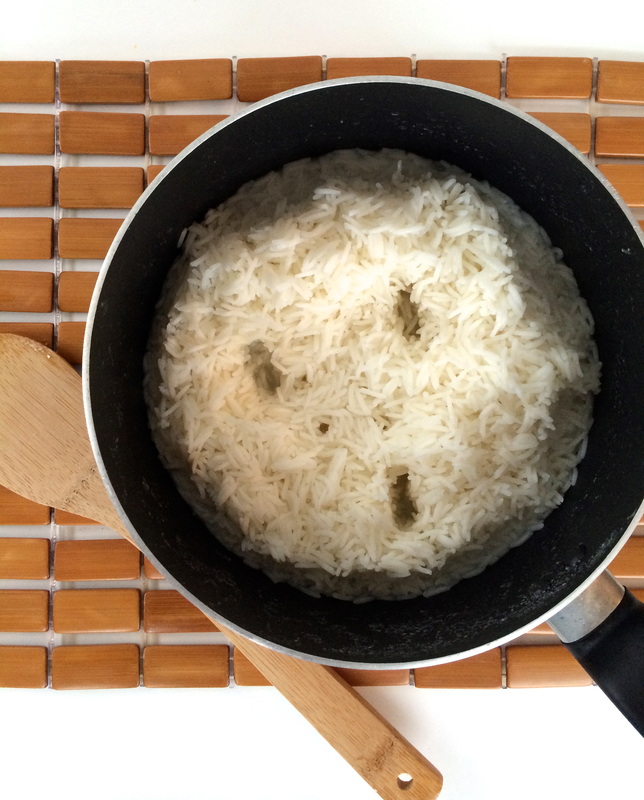
- Once all the water has evaporated, use a wooden spoon to gather the rice from the edges into the centre of the pot, creating a pyramid like pile. This prevents the rice from sticking to the side of the pot.
- Use the end of your wooden spoon to poke two or three holes in the rice. Again this creates little escape holes for the steam.
- Use the end of your wooden spoon to poke two or three holes in the rice. Again this creates little escape holes for the steam.
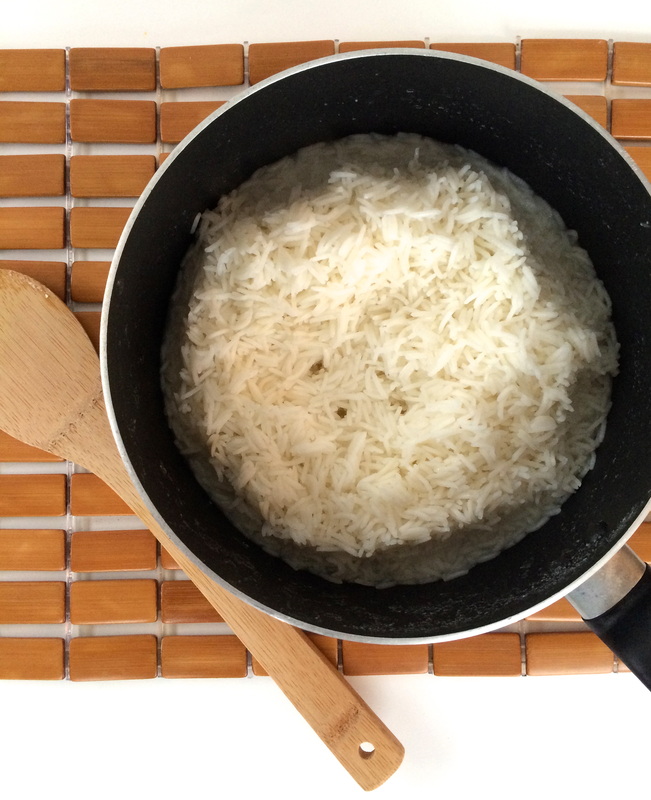
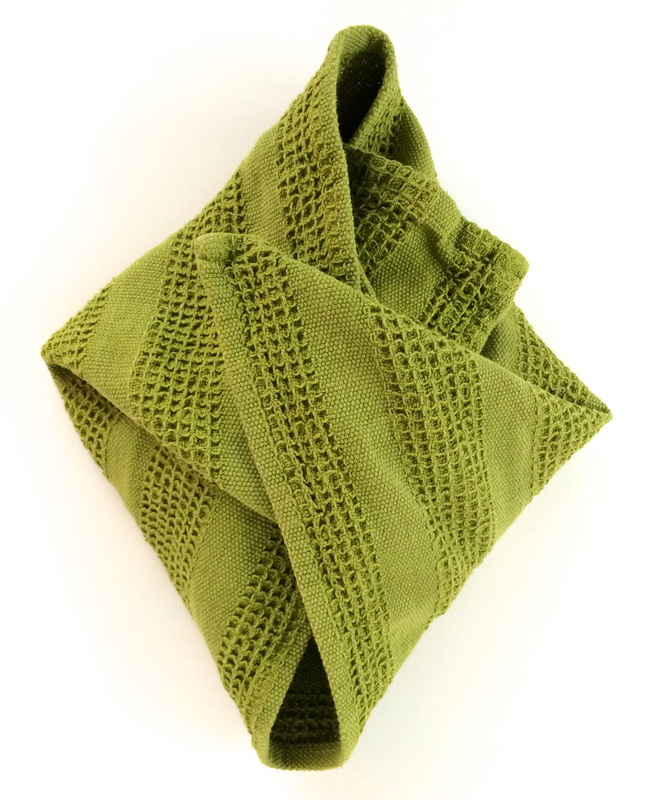
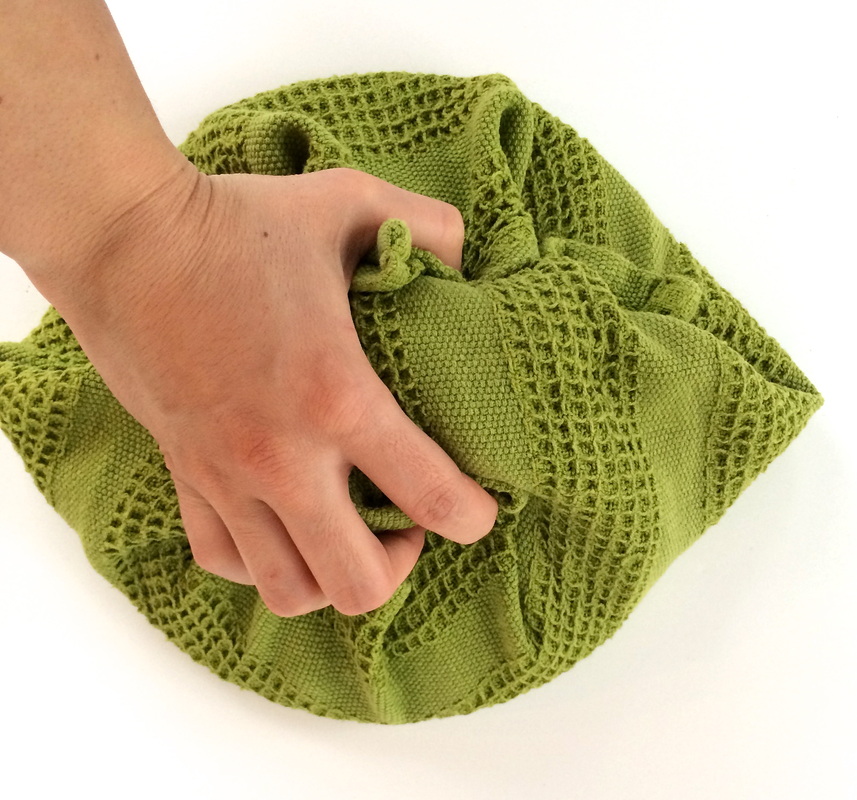
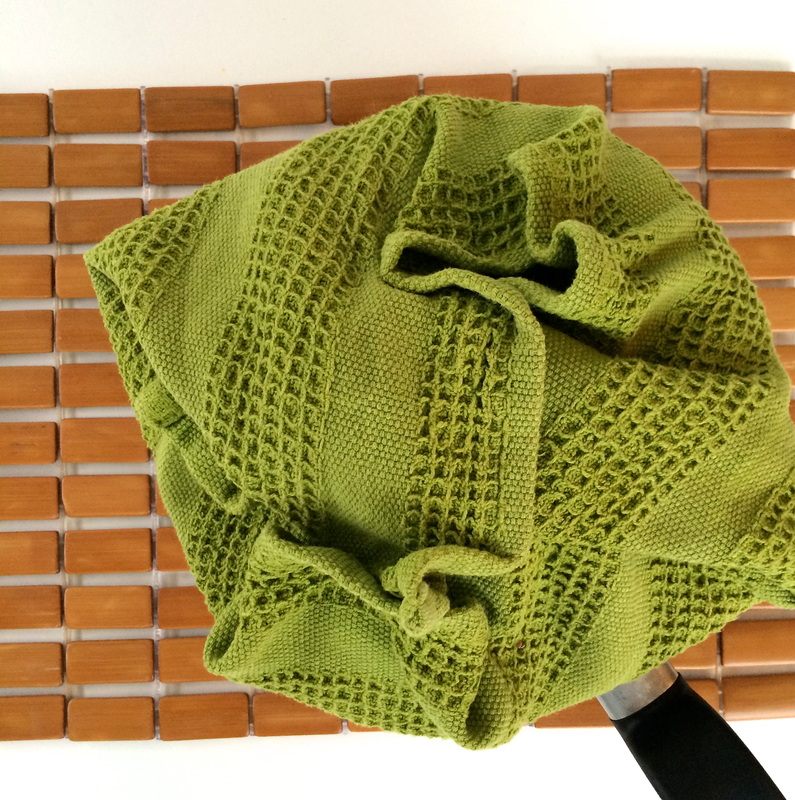
- Use a clean towel or “damkony” to wrap the lid. (you can use a few paper towels too). This step in really what the kateh is all about. With the “damkony” you keep all the steam inside the pot. Without the “damkony” the steam would escape from the edges of the lid. You want all that steam, because that is what will make your rice nice and moist. The steam is also what creates that amazing aroma and taste.
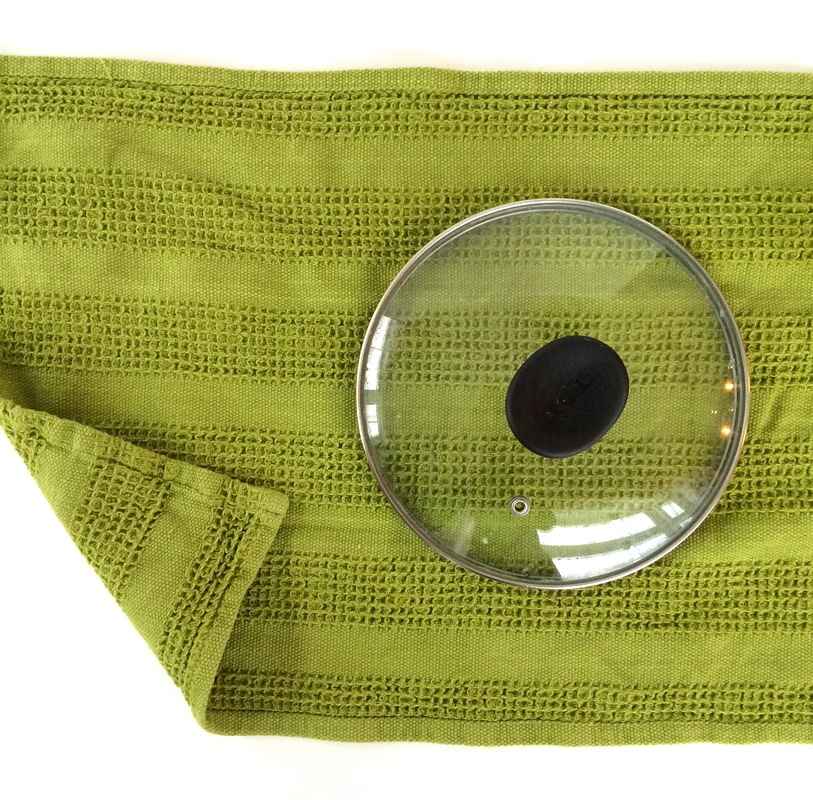

- Place the wrapped lid on the pot and reduce to low heat and cover. (approximately 20-25 mins)
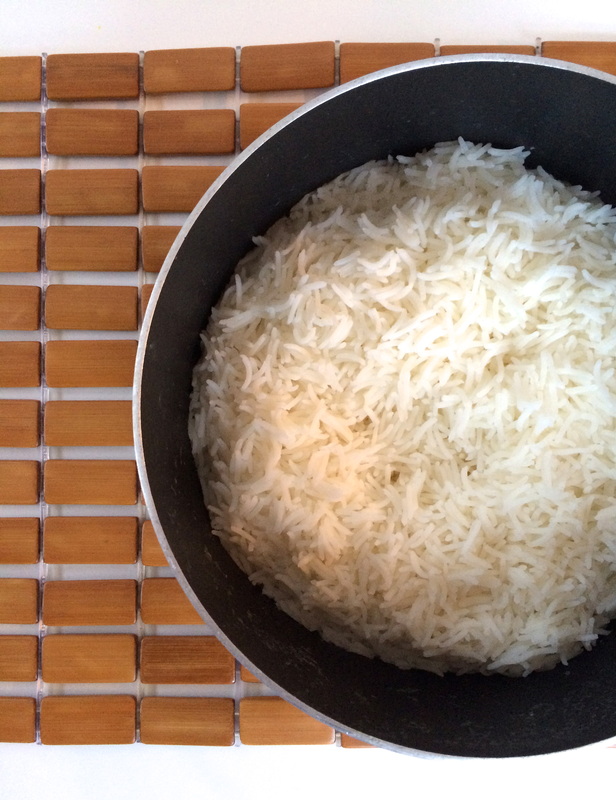
- The rice is ready. Pour it on the serving dish or on individual plates.
- The rice is ready. Pour it on the serving dish or on individual plates.
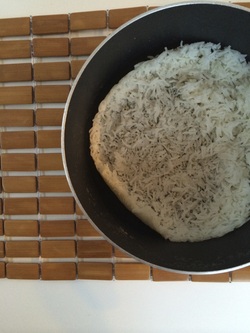
- If left on the stove long enough, the bottom will harden and this called “tahdig”, meaning the bottom of the pot. Crunchy and delicious.
You can serve this rice with any stew or “khoresht”. It’s simple and delicious. We will be making a lot of rice together, and I promise that in no time, you will become an expert. It just takes some practice. The first few times, your rice might be too sticky, but don’t let it discourage you. It takes some practice to get a feel for the type of rice you’re using. Leave me comments and let me know how your rice turned out. Enjoy :)